
How to Crochet Cables: Step-by-Step Tutorial
Mastering the Basics: Understanding the Anatomy of a Cable Stitch
Crocheting is a popular and versatile craft that allows you to create beautiful and intricate designs with just a hook and some yarn. One of the most impressive techniques in crocheting is the cable stitch. This stitch creates a raised and twisted pattern that resembles the cables on a sweater. While it may seem daunting at first, mastering the basics of cable stitching is essential to creating stunning crochet projects. In this article, we will guide you through the step-by-step process of crocheting cables, starting with understanding the anatomy of a cable stitch.
Before we dive into the specifics of crocheting cables, it is essential to understand the basic structure of a cable stitch. A cable stitch is made up of two or more stitches that are crossed over each other to create a twisted effect. The stitches are usually worked in a specific order, with some being held in the front or back of the work while others are being worked. This creates the illusion of a cable running through the fabric.
To create a cable stitch, you will need to know how to work front post and back post stitches. These stitches are worked around the post of the stitch instead of through the top loops, creating a raised effect. Front post stitches are worked from the front of the fabric, while back post stitches are worked from the back. These stitches are the building blocks of a cable stitch and are essential to mastering this technique.
Now that you understand the basic structure of a cable stitch, let’s break down the anatomy of a cable stitch. A cable stitch is made up of four parts: the base, the cross, the twist, and the top. The base is the foundation of the cable stitch and is usually made up of a row of single crochet stitches. The cross is where the stitches are crossed over each other, creating the twisted effect. The twist is the point where the stitches are held in the front or back of the work, creating the cable’s definition. Finally, the top is the finishing row of stitches that completes the cable stitch.
To create a cable stitch, you will need to follow a specific pattern or chart. The pattern will indicate the number of stitches needed for the base, the number of stitches to be crossed, and the number of stitches to be held in the front or back. It is essential to follow the pattern carefully to ensure that your cable stitch turns out correctly.
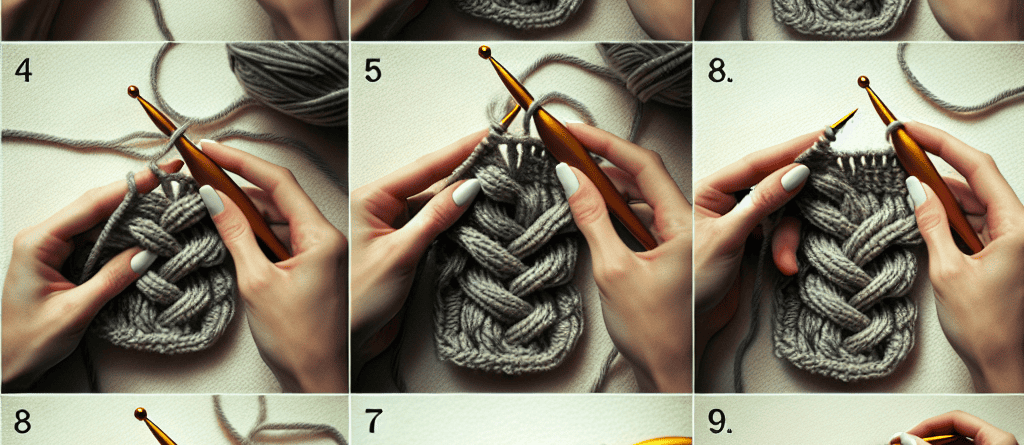
To begin crocheting a cable stitch, you will first need to create the base row. This is usually a row of single crochet stitches, but it can also be a different stitch depending on the pattern. Once you have completed the base row, you will then start working on the cross. This is where you will work the front post and back post stitches, following the pattern’s instructions. It is crucial to keep track of the stitches you are crossing and holding to avoid any mistakes.
After completing the cross, you will then work on the twist. This is where you will hold the stitches in the front or back of the work, creating the cable’s definition. It is essential to keep the tension consistent while holding the stitches to ensure that the cable looks neat and defined. Finally, you will complete the cable stitch by working the top row, which is usually a row of single crochet stitches.
In conclusion, understanding the anatomy of a cable stitch is crucial to mastering this impressive crochet technique. By knowing the basic structure of a cable stitch and following a pattern carefully, you can create beautiful and intricate designs with ease. With practice and patience, you will be able to crochet cables like a pro in no time. So grab your hook and yarn and start creating stunning cable stitch projects today!
From Simple to Complex: Building Your Skills with Different Cable Patterns
Crocheting cables may seem like a daunting task, but with a little practice and patience, you can master this beautiful technique. Cables are a type of stitch pattern that creates a raised, twisted design, resembling the look of braided ropes. They add texture and dimension to any project, making them a popular choice for sweaters, scarves, and blankets. In this step-by-step tutorial, we will guide you through the process of crocheting cables, starting from simple to more complex patterns, to help you build your skills and confidence.
Before we dive into the different cable patterns, it’s important to understand the basics of crocheting cables. Cables are created by crossing stitches over each other, which creates the twisted effect. This is achieved by working stitches out of order, either in front or behind other stitches. To create a cable, you will need to know how to work front post and back post stitches, as well as how to skip stitches.
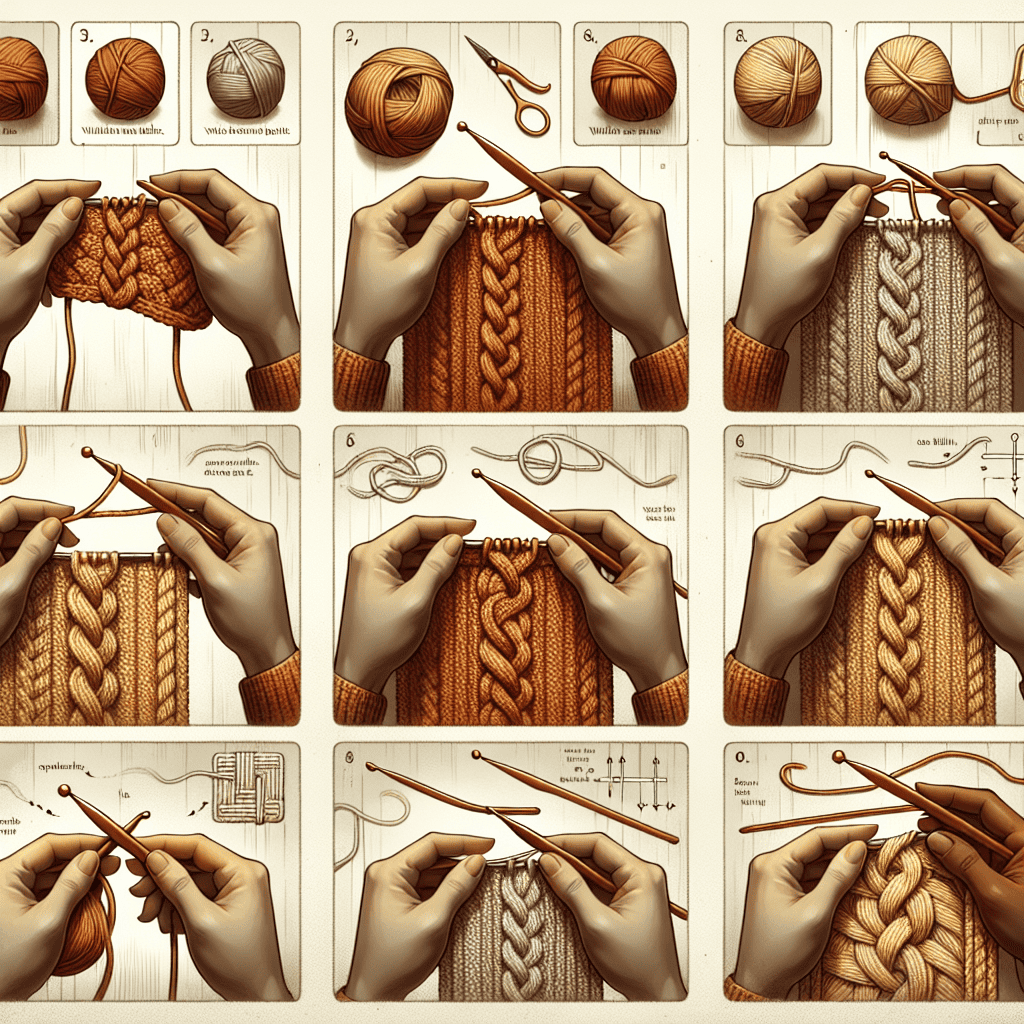
Let’s start with a simple cable pattern, the 2-stitch cable. This pattern is perfect for beginners as it only requires basic crochet stitches. To begin, you will need to chain an even number of stitches, plus two additional chains for the turning chain. For example, if you want to create a 2-stitch cable over 10 stitches, you will chain 12 stitches. Next, work a row of single crochet stitches across the chain, making sure to skip the first two chains. This will create a foundation row for your cable pattern.
To create the cable, you will need to work two front post double crochet stitches (FPdc) and two back post double crochet stitches (BPdc). To work a front post double crochet, insert your hook from the front to the back of the stitch, then around the post of the next stitch, and back to the front. Yarn over and pull up a loop, then complete the double crochet as usual. To work a back post double crochet, insert your hook from the back to the front of the stitch, then around the post of the next stitch, and back to the back. Yarn over and pull up a loop, then complete the double crochet as usual.
For the 2-stitch cable, you will work two FPdc stitches in the first two stitches, then two BPdc stitches in the next two stitches. Repeat this pattern across the row, ending with two FPdc stitches. On the next row, you will work the FPdc stitches in front of the BPdc stitches from the previous row, and vice versa. This will create the twisted effect of the cable. Continue working these two rows until your cable reaches the desired length.
Once you have mastered the 2-stitch cable, you can move on to more complex patterns. The 4-stitch cable is a popular choice and is created by working four front post and back post stitches in a row. You can also experiment with different stitch combinations, such as working a front post treble crochet (FPtr) and back post treble crochet (BPtr) to create a larger cable.
Another way to add complexity to your cable patterns is by incorporating different stitch heights. For example, you can work a front post double crochet (FPdc) and a front post treble crochet (FPtr) in the same row to create a more intricate design. You can also play with the number of stitches in between each cable, creating a more open or dense look.
As you continue to practice and experiment with different cable patterns, you will develop your own unique style and techniques. Remember to take your time and pay attention to the placement of your stitches to achieve a clean and polished look. With dedication and practice, you will soon be able to crochet cables with ease and confidence.
In conclusion, crocheting cables may seem intimidating at first, but with the right techniques and practice, you can create beautiful and intricate designs. Start with simple patterns and gradually work your way up to more complex ones. Don’t be afraid to experiment and have fun with different stitch combinations. With this step-by-step tutorial, you are now equipped with the knowledge and skills to crochet cables like a pro. Happy crocheting!
Troubleshooting Tips: Common Mistakes and How to Fix Them in Crocheting Cables
Crocheting cables can be a challenging but rewarding technique to master. It adds texture and depth to your projects, making them stand out from the usual crochet patterns. However, like any new skill, it takes practice and patience to perfect. As you embark on your journey to learn how to crochet cables, it’s essential to be aware of common mistakes that beginners make and how to fix them.
One of the most common mistakes when crocheting cables is not counting stitches correctly. Cables require a specific number of stitches to create the desired pattern, and if you miss a stitch or add an extra one, it can throw off the entire design. To avoid this, it’s crucial to count your stitches after every row and double-check that you have the correct number before moving on to the next row.
Another mistake that beginners make is not using the correct hook size. When crocheting cables, it’s essential to use a hook that is slightly larger than what is recommended for the yarn you are using. This allows the cables to stand out and creates a more defined texture. If you use a smaller hook, your cables may end up looking flat and not as prominent as they should be.
Tension is also a crucial factor when crocheting cables. If your tension is too tight, your cables will be stiff and difficult to work with. On the other hand, if your tension is too loose, your cables will be loose and floppy, making it challenging to create the desired pattern. It’s essential to find a comfortable tension that works for you and stick to it throughout your project.
Another common mistake is not following the pattern correctly. Crocheting cables requires following a specific pattern, and if you deviate from it, your cables may not turn out as expected. It’s essential to read the pattern carefully and follow each step precisely. If you’re unsure about a particular step, it’s always best to refer back to the pattern or seek help from a more experienced crocheter.
One of the most frustrating mistakes when crocheting cables is dropping a stitch. This can happen when you’re working on a cable and accidentally let go of a stitch, causing it to unravel. If this happens, don’t panic. Simply use a crochet hook to pick up the dropped stitch and continue with your pattern. It may take some practice, but with time, you’ll become more skilled at fixing dropped stitches.
Another common mistake is not weaving in the ends of your yarn correctly. When working with cables, there are often multiple yarn changes, and if you don’t weave in the ends properly, they can come loose and ruin the appearance of your project. To avoid this, make sure to weave in the ends as you go, rather than waiting until the end. This will ensure that your cables look neat and tidy.
Lastly, one of the most significant mistakes beginners make when crocheting cables is not being patient. Learning a new skill takes time and practice, and it’s essential to be patient with yourself. If your first attempt at crocheting cables doesn’t turn out as expected, don’t get discouraged. Keep practicing, and with time, you’ll become more confident and skilled at creating beautiful cable designs.
In conclusion, crocheting cables can be a challenging but rewarding technique to master. As you embark on your journey to learn how to crochet cables, it’s essential to be aware of common mistakes and how to fix them. Remember to count your stitches, use the correct hook size, maintain proper tension, follow the pattern carefully, and be patient with yourself. With these tips in mind, you’ll be on your way to creating stunning cable designs in no time.


LEAVE A COMMENT