
How to Change Colors in Crochet Seamlessly
“Transform your crochet creations with ease – learn the art of seamless color changes!”
5 Tips for Seamlessly Changing Colors in Crochet
Crocheting is a popular hobby that allows individuals to create beautiful and intricate designs using yarn and a crochet hook. One of the techniques used in crochet is changing colors, which can add depth and dimension to a project. However, changing colors in crochet can be a daunting task for beginners, as it requires precision and attention to detail. In this article, we will discuss five tips for seamlessly changing colors in crochet.
Tip #1: Plan Ahead
Before starting a crochet project that involves changing colors, it is important to plan ahead. This means having a clear idea of where and how often you want to change colors in your project. Planning ahead will help you determine the number of stitches needed for each color and ensure that the color changes are evenly distributed throughout the project.
Tip #2: Use the Invisible Join Technique
The invisible join technique is a great way to seamlessly change colors in crochet. This technique involves joining the new color to the last stitch of the previous color, creating a smooth and seamless transition. To use this technique, simply complete the last stitch of the previous color, cut the yarn, and pull the new color through the last stitch. This will create a seamless join without any noticeable knots or bumps.
Tip #3: Carry the Yarn Along the Side
Another way to seamlessly change colors in crochet is by carrying the yarn along the side of your work. This technique is commonly used in projects that involve stripes or color blocks. To carry the yarn, simply crochet over the unused color as you work. This will eliminate the need to cut and weave in the yarn, resulting in a seamless color change.
Tip #4: Use a Tapestry Needle to Weave in Ends
When changing colors in crochet, it is important to weave in the ends of the yarn to secure them and prevent unraveling. To ensure a seamless color change, use a tapestry needle to weave in the ends. This will create a neater and more polished look compared to simply tying a knot. Additionally, weaving in the ends will prevent any loose ends from getting caught on clothing or other items.
Tip #5: Practice and Experiment
As with any skill, practice makes perfect. Changing colors in crochet may seem intimidating at first, but with practice, it will become second nature. It is also important to experiment with different techniques and find what works best for you. Some crocheters prefer the invisible join technique, while others may find that carrying the yarn along the side works better for them. Don’t be afraid to try different methods and see what works best for your project.
In conclusion, changing colors in crochet can add depth and dimension to your projects. By planning ahead, using the invisible join technique, carrying the yarn along the side, weaving in ends with a tapestry needle, and practicing and experimenting, you can seamlessly change colors in your crochet projects. With these tips in mind, you can confidently tackle any project that involves changing colors and create beautiful and professional-looking pieces. Happy crocheting!
Mastering the Art of Color Changes in Crochet: Techniques and Tricks
Crocheting is a beautiful and versatile craft that allows for endless possibilities in terms of design and color. One of the most important skills to master in crochet is the art of changing colors seamlessly. Whether you are creating a striped pattern or adding intricate details to your project, knowing how to change colors smoothly can elevate your crochet work to the next level. In this article, we will discuss techniques and tricks to help you master the art of color changes in crochet.
The first step in changing colors seamlessly is to understand the different methods of color changes. The most common method is the cut and tie method, where you cut the yarn and tie on the new color. While this method is simple, it can result in a visible knot and an uneven edge. Another method is the carry-along method, where you carry the unused color along the back of your work. This method is great for small color changes, but it can become bulky and messy for larger color changes. The third method is the invisible join method, which involves joining the new color without any visible knots or bumps. This method is ideal for color changes in the middle of a row or round.
Once you have chosen the method that best suits your project, it is important to prepare your yarn before starting the color change. This includes making sure that both yarns are of the same weight and thickness, and that the new color is securely attached to the old color. You can achieve this by tying a small knot or using a slip stitch to join the two colors together.
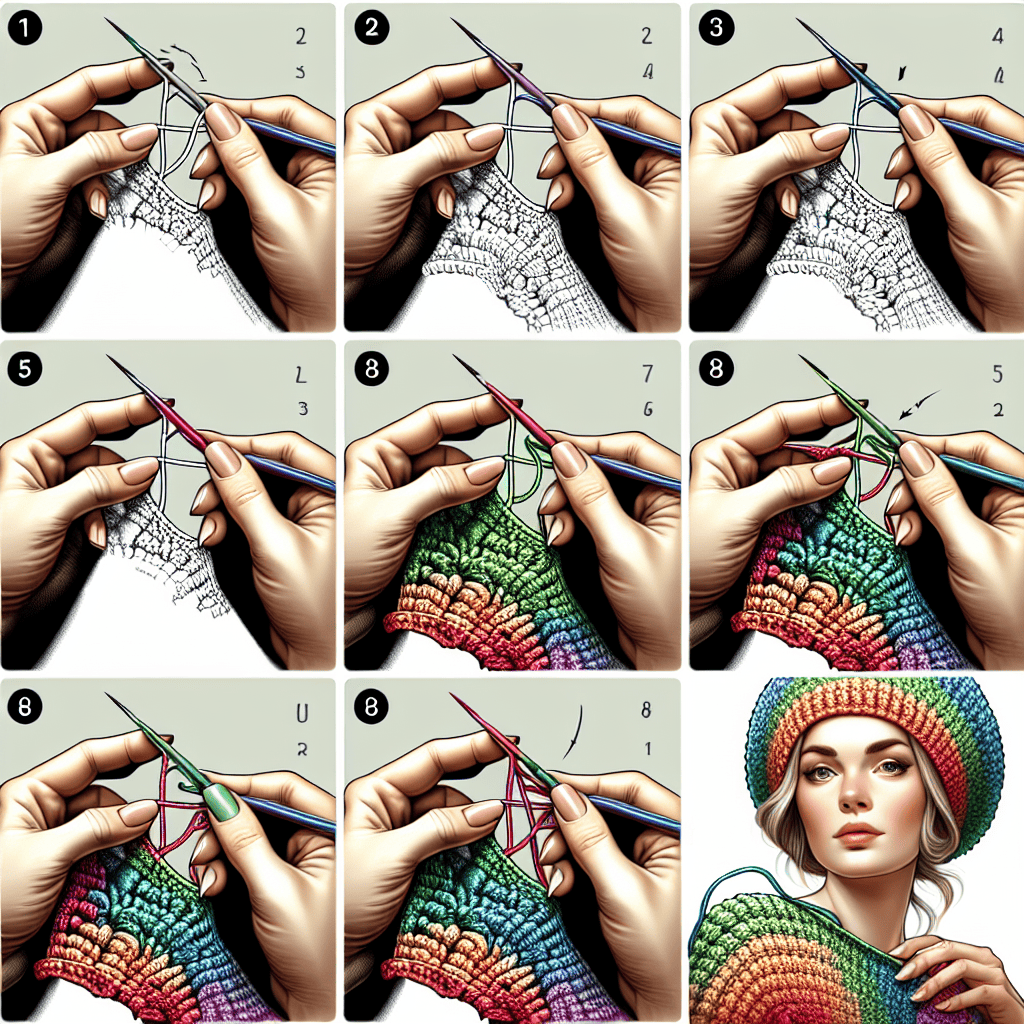
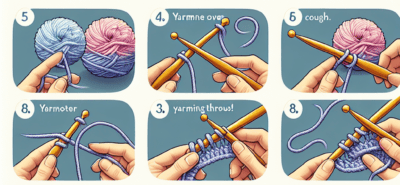
When changing colors in the middle of a row or round, it is important to know where to place the new color. The general rule is to change colors at the end of a stitch, rather than in the middle. This will help create a clean and even color change. To do this, work the last stitch of the old color until there are two loops left on your hook. Then, yarn over with the new color and pull through both loops to complete the stitch. This will create a seamless transition between colors.
Another important aspect to consider when changing colors is the tension of your stitches. Uneven tension can result in gaps or bumps in your work, making the color change more noticeable. To avoid this, make sure to maintain the same tension throughout your project, and adjust accordingly when changing colors.
When working with multiple colors in a row or round, it is important to carry the unused colors along the back of your work. This will prevent them from getting tangled and will create a neater finish. To do this, simply hold the unused color along the back of your work and crochet over it as you normally would. Make sure to keep the carried yarn loose enough so that it does not pull on your stitches, but not too loose that it creates gaps in your work.
In addition to these techniques, there are also some tricks that can help you achieve seamless color changes. One trick is to use a stitch marker to mark the last stitch of the old color. This will help you keep track of where to change colors and ensure that your color changes are consistent throughout your project. Another trick is to use a tapestry needle to weave in the ends of your yarn. This will create a neater finish and hide any knots or bumps from the color change.
In conclusion, mastering the art of color changes in crochet takes practice and patience. By understanding the different methods, preparing your yarn, and paying attention to tension and placement, you can achieve seamless color changes in your crochet work. With these techniques and tricks, you can take your crochet projects to the next level and create beautiful and intricate designs with ease.
Creating a Smooth Color Transition in Crochet: Step-by-Step Guide
Crocheting is a popular hobby that allows individuals to create beautiful and intricate designs using yarn and a crochet hook. One of the most challenging aspects of crocheting is changing colors seamlessly. A smooth color transition can make a significant difference in the overall appearance of a crochet project. However, it can be a daunting task for beginners and even experienced crocheters. In this article, we will guide you through the step-by-step process of creating a smooth color transition in crochet.
Step 1: Choose the Right Yarn
The first step in creating a smooth color transition in crochet is to choose the right yarn. It is essential to select yarns that are of the same weight and texture. Using different weights or textures of yarn can result in an uneven and bumpy transition. It is also crucial to choose colors that complement each other and blend well together. This will ensure a seamless color transition in your crochet project.
Step 2: Prepare Your Yarn
Before starting your crochet project, it is essential to prepare your yarn for the color change. Cut the yarn of the color you want to change to, leaving a tail of at least six inches. This tail will be used later to weave in the ends. Then, take the new color yarn and make a slip knot at the end. This will be the starting point for your new color.
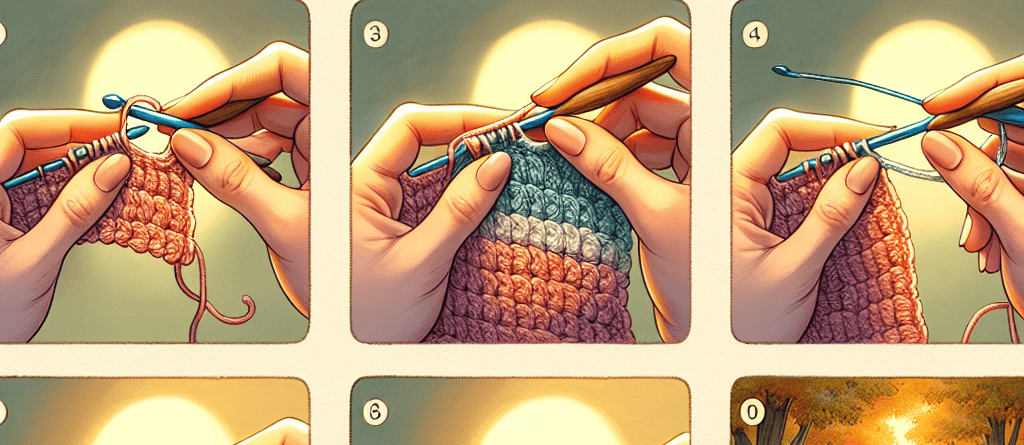
Step 3: Crochet Until the Last Stitch
Now, it’s time to start crocheting with the new color. Work on your project until you reach the last stitch of the previous color. When you reach the last stitch, stop before completing it.
Step 4: Finish the Last Stitch with the New Color
To finish the last stitch with the new color, insert your hook into the last stitch, yarn over with the new color, and pull through the last stitch. You will now have two loops on your hook, one of the previous color and one of the new color. Yarn over with the new color again and pull through both loops. This will complete the last stitch with the new color, and you can now continue crocheting with the new color.
Step 5: Weave in the Ends
After completing a few rows with the new color, it’s time to weave in the ends. Take the tail of the previous color and weave it in using a tapestry needle. This will secure the yarn and prevent it from unraveling. Repeat the same process with the tail of the new color.
Step 6: Carry the Yarn Along the Side
If you are working on a project that requires multiple color changes, you can carry the yarn along the side of your work. This will save you time and effort in weaving in the ends after each color change. To do this, crochet over the yarn you are not using, making sure to keep it tight and hidden within the stitches. When you reach the end of the row, cut the yarn you are carrying and continue with the new color.
Step 7: Practice Makes Perfect
Creating a smooth color transition in crochet takes practice. Don’t be discouraged if your first few attempts are not perfect. Keep practicing, and you will soon master the technique. Experiment with different color combinations and patterns to create unique and beautiful designs.
In conclusion, changing colors seamlessly in crochet is a skill that can elevate your crochet projects to the next level. By following these simple steps and practicing, you can create smooth color transitions in your crochet projects effortlessly. Remember to choose the right yarn, prepare your yarn, finish the last stitch with the new color, weave in the ends, and practice. With these tips, you can create stunning and seamless color transitions in all your crochet projects.
Q&A
1. How can I change colors in crochet without leaving a noticeable seam?
To change colors seamlessly in crochet, you can use the “invisible join” technique. This involves joining the new color with a slip stitch, then pulling the yarn through the last stitch of the previous color. This creates a smooth transition without any visible seam.
2. Are there any tips for choosing colors that will blend well in a crochet project?
When choosing colors for a crochet project, it’s important to consider the color wheel. Colors that are next to each other on the wheel, such as blue and green, will blend well together. You can also use a color gradient or ombre yarn to create a seamless color transition.
3. Can I change colors in the middle of a row in crochet?
Yes, you can change colors in the middle of a row in crochet. To do this, simply work until the last stitch of the old color, then join the new color and continue with the new color for the rest of the row. This is a great technique for creating stripes or color blocks in your crochet projects.


LEAVE A COMMENT