

DIY Crochet Easter Bunny Pattern
“Hop into spring with our easy-to-follow DIY crochet Easter bunny pattern!”
How to Create a Cute and Easy DIY Crochet Easter Bunny Pattern
Easter is just around the corner, and what better way to celebrate than by creating your own DIY crochet Easter bunny pattern? Not only is it a fun and creative activity, but it also makes for a unique and personalized gift for your loved ones. In this article, we will guide you through the process of creating a cute and easy DIY crochet Easter bunny pattern.
First and foremost, you will need to gather all the necessary materials. This includes yarn in your desired color, a crochet hook, stuffing, scissors, and a yarn needle. You can choose any color you like for your bunny, but pastel shades are perfect for the Easter theme. Make sure to choose a soft and durable yarn, as it will give your bunny a plush and cuddly feel.
Once you have all your materials ready, it’s time to start crocheting. The first step is to create the body of the bunny. To do this, you will need to start with a magic ring and work in rounds. If you are new to crocheting, a magic ring is a technique used to create a tight and seamless circle. You can easily find tutorials online on how to create a magic ring.
Next, you will need to increase the number of stitches in each round to create the shape of the bunny’s body. This can be done by adding an extra stitch in every few stitches. As you work your way up, make sure to stuff the body with the stuffing to give it a full and fluffy look. Once you have reached the desired size, you can close the body by pulling the yarn through the remaining stitches and securing it with a knot.
Now it’s time to create the bunny’s head. This is done in a similar way to the body, but with fewer stitches and a smaller size. You can also add some details to the head, such as a nose and eyes, using a different color of yarn or by embroidering them on. Once the head is complete, you can attach it to the body using a yarn needle.
The next step is to create the bunny’s ears. This can be done by crocheting two long and thin pieces of yarn and then folding them in half. You can then attach them to the head by sewing them on with a yarn needle. To give the ears a more realistic look, you can add some stuffing to them as well.
To complete the bunny’s look, you can add some finishing touches such as a cute bow tie or a small basket filled with Easter eggs. These can be easily made using different colors of yarn and some basic crochet techniques. You can also add some personalization by embroidering the recipient’s name on the bunny’s ear or adding a small tag with a special message.
Creating your own DIY crochet Easter bunny pattern is not only a fun and creative activity, but it also allows you to add a personal touch to your Easter decorations. You can make multiple bunnies in different colors and sizes to create a cute and colorful display. It’s also a great way to involve children in the Easter preparations and teach them a new skill.
In conclusion, with some basic crochet skills and a little bit of patience, you can easily create a cute and easy DIY crochet Easter bunny pattern. It’s a perfect activity for the Easter season and makes for a unique and thoughtful gift for your loved ones. So why not give it a try and add some handmade charm to your Easter celebrations this year?
5 Must-Try Variations of the Classic Crochet Easter Bunny Pattern
Easter is just around the corner, and what better way to celebrate than by making your own crochet Easter bunny? This classic pattern has been a favorite among crafters for years, and for good reason. It’s cute, versatile, and perfect for adding a touch of handmade charm to your Easter decorations. But why settle for the same old pattern when you can try out some fun variations? In this article, we’ll explore 5 must-try variations of the classic crochet Easter bunny pattern.
1. Amigurumi Easter Bunny
Amigurumi is a Japanese crochet technique that involves creating small, stuffed animals or objects. This variation of the classic Easter bunny pattern is perfect for those who want to add a touch of whimsy to their Easter decorations. To make an amigurumi Easter bunny, you’ll need to use a smaller hook and thinner yarn to create a tighter stitch. This will give your bunny a more compact and rounded shape. You can also experiment with different colors and patterns to make your bunny truly unique.
2. Giant Easter Bunny
If you want to make a statement with your Easter decorations, why not try making a giant crochet Easter bunny? This variation is perfect for those who have some experience with crochet and are looking for a challenge. To make a giant bunny, you’ll need to use a larger hook and thicker yarn to create a bigger stitch. You can also stuff your bunny with a pillow or foam to give it a more three-dimensional look. This variation is sure to be a showstopper in your Easter display.
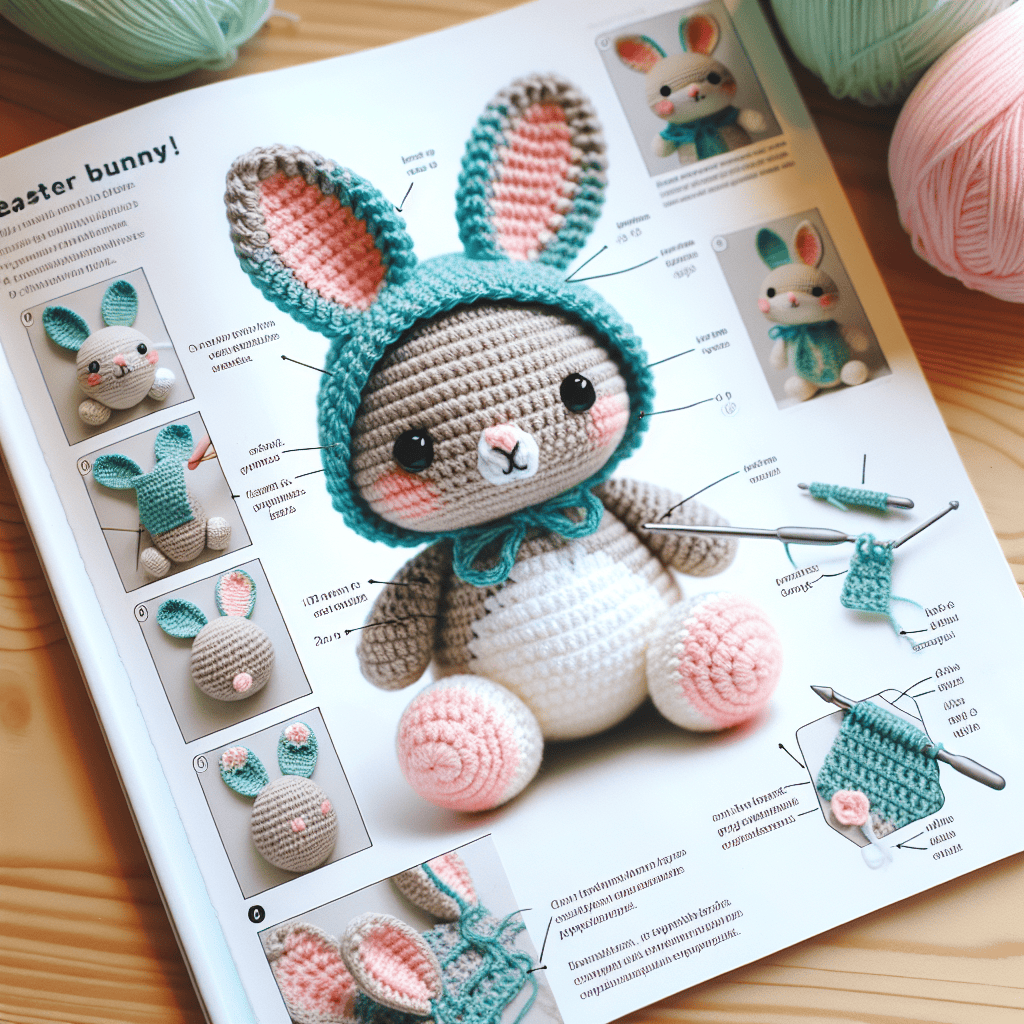
3. Hooded Easter Bunny
For a fun twist on the classic Easter bunny pattern, why not add a hood? This variation is perfect for those who want to make a bunny that’s not only cute but also functional. To make a hooded Easter bunny, you’ll need to crochet a separate hood and attach it to the bunny’s head. You can also add some cute details like ears or a pom-pom to the hood for an extra touch of cuteness. This variation is perfect for kids who want to play dress-up with their Easter bunny.
4. Easter Bunny Basket
Why settle for a plain Easter basket when you can make one in the shape of a bunny? This variation of the classic crochet Easter bunny pattern is perfect for those who want to combine their love for crochet and Easter traditions. To make an Easter bunny basket, you’ll need to crochet a flat circle for the base and then crochet the sides in the shape of a bunny. You can also add some cute details like a tail or a bow to make your basket even more adorable.
5. Easter Bunny Lovey
A lovey is a small, soft toy that is perfect for babies and young children. This variation of the classic crochet Easter bunny pattern is perfect for those who want to make a special gift for a little one. To make an Easter bunny lovey, you’ll need to crochet a small bunny head and attach it to a small blanket or square of fabric. You can also add some sensory elements like ribbons or crinkly fabric to make it even more engaging for babies.
In conclusion, the classic crochet Easter bunny pattern is a timeless favorite, but that doesn’t mean you can’t have some fun with it. These 5 must-try variations are perfect for adding a unique touch to your Easter decorations or for making a special gift for someone. So grab your crochet hook and yarn, and get ready to hop into the Easter spirit with these fun and creative variations of the classic crochet Easter bunny pattern.
Tips and Tricks for Perfecting Your DIY Crochet Easter Bunny Pattern
Easter is just around the corner, and what better way to celebrate than by creating your very own DIY crochet Easter bunny? Not only is it a fun and creative activity, but it also makes for a unique and personalized gift for your loved ones. However, perfecting your crochet Easter bunny pattern can be a bit tricky, especially for beginners. But fear not, as we have compiled some tips and tricks to help you create the perfect DIY crochet Easter bunny.
First and foremost, it is important to choose the right yarn for your project. When it comes to crochet Easter bunnies, soft and fluffy yarns work best to give that cute and cuddly look. Acrylic or cotton yarns are great options, as they are easy to work with and come in a variety of colors. It is also important to consider the weight of the yarn, as it can affect the size and texture of your bunny. A thicker yarn will result in a larger and more plush bunny, while a thinner yarn will create a smaller and more delicate bunny.
Next, make sure to use the right crochet hook size for your chosen yarn. The size of the hook will determine the size of your stitches, and using the wrong size can result in a bunny that is either too loose or too tight. It is recommended to use a hook that is slightly smaller than the recommended size for your yarn, as this will give your bunny a tighter and more defined look.
When starting your crochet Easter bunny, it is important to pay attention to your tension. Tension refers to the tightness of your stitches, and it is crucial to maintain a consistent tension throughout your project. If your tension is too loose, your bunny may end up looking floppy and uneven. On the other hand, if your tension is too tight, it can be difficult to insert your hook into the stitches, making the process more challenging. Practice makes perfect when it comes to tension, so don’t be afraid to unravel and start over if needed.
Another tip for perfecting your DIY crochet Easter bunny is to use stitch markers. These small tools can be placed in your work to mark the beginning and end of a round, making it easier to keep track of your stitches. This is especially helpful when working on projects with multiple rounds, as it can be easy to lose track and end up with an uneven bunny.
As you work on your crochet Easter bunny, it is important to take breaks and stretch your hands and fingers. Crocheting can be a repetitive motion, and it is important to avoid strain or injury. You can also try using ergonomic crochet hooks, which are designed to reduce strain on your hands and wrists.
Lastly, don’t be afraid to add your own personal touch to your DIY crochet Easter bunny. You can experiment with different colors, add embellishments such as bows or buttons, or even create different sizes and shapes. The beauty of DIY projects is that you have the freedom to make it your own and let your creativity shine.
In conclusion, creating a DIY crochet Easter bunny can be a fun and rewarding experience. By choosing the right yarn and hook size, paying attention to your tension, and using stitch markers, you can create a perfect and adorable bunny. Remember to take breaks and add your own personal touch to make your bunny truly unique. Happy crocheting and happy Easter!
Q&A
Q: What materials do I need to make a DIY crochet Easter bunny?
A: You will need yarn, a crochet hook, stuffing, scissors, and a tapestry needle.
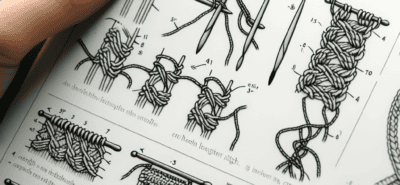
Q: Are there any specific stitches I need to know for this pattern?
A: Yes, you will need to know how to do a single crochet, double crochet, and slip stitch.
Q: Where can I find a good DIY crochet Easter bunny pattern?
A: There are many patterns available online, on websites such as Pinterest, Etsy, and Ravelry. You can also find patterns in crochet books or magazines.


LEAVE A COMMENT