
How to Crochet Wall Hangings: Easy DIY Guide
“Unleash your creativity and beautify your walls with our easy DIY guide to crocheting stunning wall hangings.”
5 Essential Supplies for Creating Crochet Wall Hangings
Crochet wall hangings have become a popular home decor trend in recent years. Not only do they add a touch of warmth and texture to any room, but they also allow for a personal and unique touch to be added to your space. If you’re interested in creating your own crochet wall hanging, there are a few essential supplies that you’ll need to get started. In this article, we’ll discuss the top 5 supplies that are essential for creating crochet wall hangings.
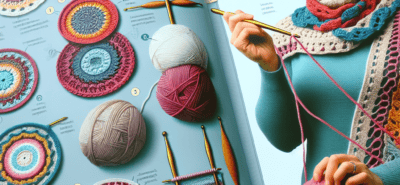
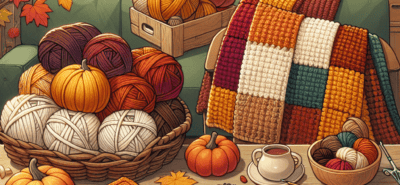
1. Yarn
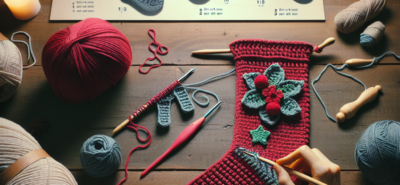
The most important supply for creating crochet wall hangings is, of course, yarn. When choosing yarn for your project, it’s important to consider the weight, texture, and color. For wall hangings, it’s best to use a bulky or super bulky weight yarn as it will create a thicker and more textured piece. The texture of the yarn is also important as it will add dimension to your wall hanging. You can choose from a variety of textures such as cotton, wool, or acrylic. Lastly, consider the color of your yarn. You can opt for a single color or mix and match different colors to create a unique and eye-catching piece.
2. Crochet Hook
A crochet hook is the tool that you’ll use to create your wall hanging. When choosing a crochet hook, it’s important to consider the size and material. The size of your hook will depend on the weight of your yarn. For bulky or super bulky yarn, a larger hook size such as a 9mm or 10mm is recommended. As for the material, you can choose from aluminum, plastic, or wood. Each material has its own benefits, so it’s best to try out different types to see which one you prefer.
3. Scissors
Scissors are an essential tool for any crochet project, including wall hangings. You’ll need them to cut your yarn and trim any excess ends. It’s important to have a sharp pair of scissors to ensure clean cuts and prevent fraying. You can also invest in a pair of small embroidery scissors for more precise cuts.
4. Tapestry Needle
A tapestry needle is a large, blunt needle with a large eye that is used for weaving in ends and sewing pieces together. This is an essential tool for creating crochet wall hangings as you’ll need to weave in the ends of your yarn to secure them and create a clean finish. You can also use a tapestry needle to sew different pieces of your wall hanging together, such as attaching tassels or other embellishments.
5. Wooden Dowel or Branch
The final essential supply for creating crochet wall hangings is a wooden dowel or branch. This will serve as the base for your wall hanging and will be used to hang it on your wall. You can choose from a variety of sizes and shapes, depending on the size and style of your wall hanging. A wooden dowel can be found at any craft store, or you can opt for a more natural look by using a branch from your backyard.
In conclusion, these 5 essential supplies are all you need to get started on creating your own crochet wall hanging. With the right yarn, crochet hook, scissors, tapestry needle, and wooden dowel or branch, you’ll be on your way to creating a beautiful and unique piece of home decor. Remember to have fun and experiment with different colors, textures, and patterns to create a wall hanging that reflects your personal style. Happy crocheting!
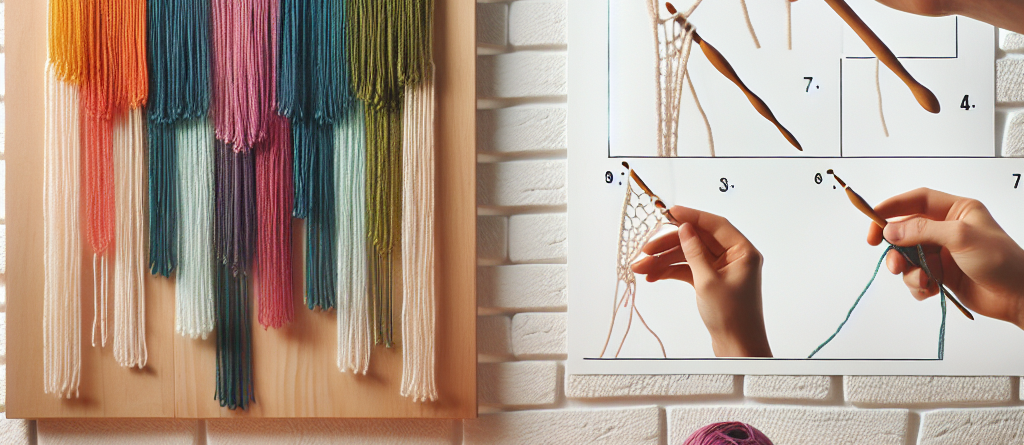
Step-by-Step Tutorial: How to Crochet a Simple Wall Hanging

Crocheting has been a popular craft for centuries, and it’s no surprise that it has evolved to include more than just blankets and scarves. One of the latest trends in the world of crochet is creating beautiful wall hangings. These unique pieces of art can add a touch of warmth and personality to any room in your home. If you’re new to crocheting or just looking for a fun and easy project, this step-by-step tutorial will guide you through the process of creating a simple yet stunning crochet wall hanging.
Step 1: Gather Your Materials
The first step in any crochet project is to gather all the necessary materials. For this wall hanging, you will need a crochet hook, yarn, scissors, and a wooden dowel or branch. The size of your crochet hook will depend on the thickness of your yarn, so make sure to check the label for the recommended hook size. As for the yarn, you can choose any color or texture that you like. This is where you can get creative and make your wall hanging truly unique.
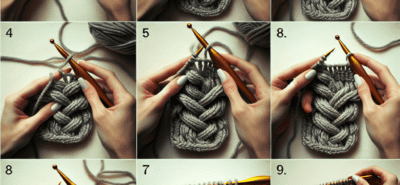
Step 2: Create a Slip Knot
To start your crochet project, you will need to create a slip knot. This is the first loop on your crochet hook that will serve as the foundation for your stitches. To make a slip knot, simply wrap the yarn around your fingers and pull the end through the loop. Then, place the loop on your crochet hook and tighten it by pulling on the yarn.
Step 3: Chain Stitch
The next step is to create a chain stitch. This is the most basic stitch in crochet and will be the foundation for your wall hanging. To make a chain stitch, yarn over (wrap the yarn around your hook) and pull the yarn through the loop on your hook. Repeat this process until you have the desired length for your wall hanging. Remember to keep your stitches loose to create a more open and airy look.
Step 4: Single Crochet
Once you have your chain stitches, it’s time to move on to the single crochet stitch. This stitch will add texture and depth to your wall hanging. To make a single crochet, insert your hook into the second chain from the hook, yarn over, and pull the yarn through the chain. You should now have two loops on your hook. Yarn over again and pull the yarn through both loops on your hook. Repeat this process until you reach the end of the chain.
Step 5: Double Crochet
To add even more texture to your wall hanging, you can use the double crochet stitch. This stitch is similar to the single crochet, but instead of pulling the yarn through two loops, you will pull it through three. This will create a taller stitch and give your wall hanging a more intricate look. Continue to work in double crochet stitches until you reach the end of the row.
Step 6: Repeat and Add Fringe
To complete your wall hanging, simply repeat the single and double crochet stitches until you reach the desired length. You can also add fringe to the bottom of your wall hanging for a bohemian touch. To make fringe, cut several strands of yarn to your desired length and attach them to the bottom of your wall hanging by tying a knot.
Step 7: Attach to a Dowel or Branch
Once you have completed your crochet wall hanging, it’s time to attach it to a dowel or branch. Simply fold the top of your wall hanging over the dowel or branch and secure it with a knot or some hot glue. You can also add a string or ribbon to the top of the dowel for hanging.
In conclusion, crocheting a wall hanging is a fun and easy DIY project that can add a personal touch to your home decor. With just a few basic stitches and some creativity, you can create a beautiful and unique piece of art that will be sure to impress. So grab your crochet hook and yarn, and start creating your very own crochet wall hanging today!
Creative Ideas for Customizing Your Crochet Wall Hangings
Crochet wall hangings have become increasingly popular in recent years, and for good reason. They add a unique and personal touch to any room, and can be customized to fit any style or theme. If you’re looking to add some creative flair to your home decor, why not try making your own crochet wall hanging? In this article, we’ll guide you through the process of creating your own customized crochet wall hanging.
The first step in creating a crochet wall hanging is to gather your materials. You will need a crochet hook, yarn in your desired colors, and a wooden dowel or branch for hanging. You can also add additional embellishments such as beads or feathers, depending on your personal preference.
Once you have your materials, it’s time to choose a pattern for your wall hanging. There are countless patterns available online, or you can create your own design. Keep in mind the size of your wall hanging and the level of difficulty you are comfortable with. For beginners, a simple pattern with basic stitches is recommended.
Next, it’s time to start crocheting. Begin by creating a foundation chain, which will determine the width of your wall hanging. Then, work your way up by following the pattern you have chosen. It’s important to keep your tension consistent throughout to ensure an even and neat finished product.
As you crochet, you can add in different colors or textures of yarn to create a unique and eye-catching design. You can also experiment with different stitches, such as the popular bobble stitch or the more intricate popcorn stitch. Don’t be afraid to get creative and make the wall hanging your own.
Once you have completed the main body of your wall hanging, it’s time to add any additional embellishments. This is where you can really let your creativity shine. You can add beads or tassels to the bottom of your wall hanging, or attach feathers or other decorative elements. These extra touches will add dimension and interest to your wall hanging.
After all the crocheting is done, it’s time to attach your wall hanging to the wooden dowel or branch. Simply fold the top of your crochet piece over the dowel and secure it with a few stitches. You can also add a loop of yarn at the top for hanging, or use a decorative ribbon or twine.
Now that your crochet wall hanging is complete, it’s time to find the perfect spot to display it. These wall hangings look great in any room, from the living room to the bedroom. You can also make smaller versions to hang in a nursery or child’s room. The possibilities are endless.
One of the best things about crochet wall hangings is that they can be easily customized to fit any style or theme. You can use neutral colors for a bohemian or minimalist look, or go bold with bright colors for a more eclectic feel. You can also add in different textures of yarn, such as chunky or fuzzy, to add depth to your wall hanging.
In addition to being a beautiful addition to your home decor, crochet wall hangings also make great gifts. You can personalize them for friends and family by incorporating their favorite colors or patterns. They are also a great way to use up leftover yarn from other projects.
In conclusion, crochet wall hangings are a fun and easy way to add a personal touch to your home decor. With a few basic materials and some creativity, you can create a unique and beautiful piece of art for your walls. So why not give it a try and see what kind of crochet wall hanging you can create? The possibilities are endless.
Q&A
Q: What materials do I need to crochet wall hangings?
A: You will need yarn, a crochet hook, scissors, a tapestry needle, and a wooden dowel or branch for hanging.
Q: What are some basic crochet stitches used in wall hangings?
A: Some common stitches used in crochet wall hangings include single crochet, double crochet, and half double crochet. You may also use more advanced stitches like the shell stitch or the bobble stitch for added texture.
Q: Are there any tips for beginners learning to crochet wall hangings?
A: Yes, some tips for beginners include starting with a simple pattern, practicing tension control, and using a thicker yarn for easier handling. It’s also helpful to watch video tutorials or attend a crochet class to learn the basics.

LEAVE A COMMENT