
How to Crochet Christmas Stockings (Free Pattern)
“Deck the halls with handmade love – crochet your own Christmas stockings with our free pattern!”
5 Easy Steps to Crochet Your Own Christmas Stockings
Christmas is a time for giving and spreading joy, and what better way to do that than by making your own personalized Christmas stockings? Crocheting your own stockings not only adds a personal touch to your holiday decor, but it also allows you to create something unique and special for your loved ones. In this article, we will guide you through 5 easy steps to crochet your own Christmas stockings, complete with a free pattern.
Step 1: Gather Your Materials
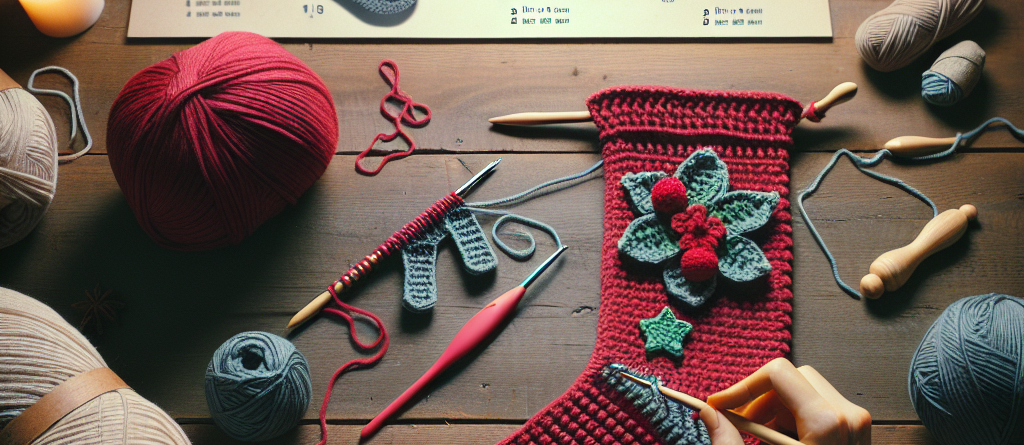
The first step to crocheting your own Christmas stockings is to gather all the necessary materials. You will need a crochet hook, yarn in your desired colors, scissors, a tapestry needle, and a stitch marker. It is important to choose a yarn that is suitable for the size of your crochet hook and the desired thickness of your stockings. You can also choose to add embellishments such as buttons, ribbons, or pom-poms to your stockings for an extra festive touch.
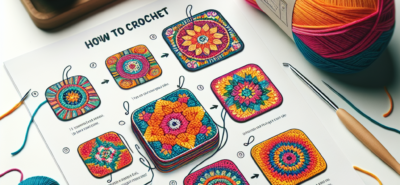
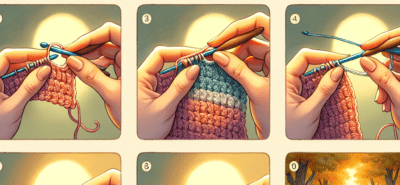
Step 2: Start with a Magic Ring
To begin crocheting your stockings, you will need to start with a magic ring. This technique allows you to create a tight and seamless circle, which is perfect for the base of your stockings. To make a magic ring, wrap the yarn around your fingers twice, then insert your hook through the first loop and pull the second loop through. This will create a loop on your hook, which you can then use to start your first round of stitches.
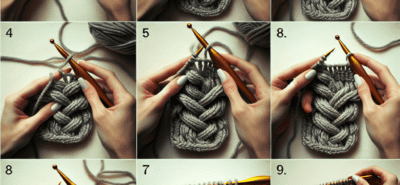
Step 3: Follow the Pattern
Now that you have your magic ring, it’s time to start following the pattern. You can find many free crochet patterns online, or you can create your own. The pattern will guide you through the number of stitches and rounds needed to create your stockings. It is important to pay attention to the pattern and count your stitches to ensure that your stockings turn out the right size and shape.
Step 4: Add Personal Touches
Once you have completed the main body of your stockings, you can add personal touches to make them unique. This is where you can get creative and add embellishments or use different colors of yarn to create stripes or patterns. You can also choose to add a cuff to the top of your stockings for a more traditional look. The possibilities are endless, and this is where you can truly make your stockings one-of-a-kind.
Step 5: Finish and Assemble
The final step to crocheting your own Christmas stockings is to finish and assemble them. Once you have completed all the rounds of your pattern, you will need to fasten off your yarn and weave in any loose ends. Then, use your tapestry needle to sew the sides of your stockings together, leaving the top open. You can also choose to add a loop or ribbon for hanging your stockings. And just like that, your handmade Christmas stockings are ready to be hung by the fireplace.
Crocheting your own Christmas stockings may seem like a daunting task, but with these 5 easy steps, you can create beautiful and personalized stockings for your loved ones. Not only is it a fun and creative activity, but it also adds a special touch to your holiday decor. So why not give it a try this holiday season and spread some handmade joy with your very own crocheted Christmas stockings.
10 Free Crochet Patterns for Festive Christmas Stockings

Christmas is a time for giving, and what better way to spread holiday cheer than by making your own festive decorations? Crocheting Christmas stockings is a fun and creative way to add a personal touch to your holiday decor. Not only are they a beautiful addition to your home, but they also make for thoughtful and unique gifts for your loved ones. In this article, we will guide you through the process of crocheting your very own Christmas stockings with a free pattern included.
Before we dive into the pattern, let’s go over some basic crochet techniques that you will need to know. Crocheting is a method of creating fabric by interlocking loops of yarn with a crochet hook. The size of the hook and the thickness of the yarn will determine the size of your stitches. If you are new to crocheting, it is recommended to start with a larger hook and thicker yarn to make it easier to see your stitches.
Now, let’s get started with the pattern. The first step is to gather your materials. For this project, you will need a crochet hook (size H/5mm), worsted weight yarn in your desired colors, scissors, and a yarn needle. Once you have all your materials, you can begin crocheting your Christmas stocking.
To start, make a slip knot and chain 31 stitches. This will be the base of your stocking. Next, single crochet in the second chain from the hook and in each chain across. This will give you a total of 30 single crochet stitches. Chain one and turn your work.
For the next row, single crochet in each stitch across. Repeat this row until your work measures approximately 14 inches. This will be the length of your stocking. Once you have reached the desired length, fasten off and weave in any loose ends.
Now it’s time to add some festive details to your stocking. You can use different colors of yarn to create stripes or add a border around the top of the stocking. You can also add pom-poms, tassels, or buttons for a unique touch. Let your creativity shine and make your stocking one-of-a-kind.
To create the toe of the stocking, fold your work in half and sew the sides together, leaving the top open. Next, fold the top edge down to create a cuff and sew it in place. You can also add a loop at the top for hanging your stocking.
Congratulations, you have just completed your very own crocheted Christmas stocking! You can now fill it with small gifts and treats or hang it by the fireplace for a festive touch.
If you’re looking for more crochet patterns for Christmas stockings, here are 10 free patterns to inspire you:
1. Classic Crochet Christmas Stocking by Yarnspirations – This traditional stocking pattern is perfect for beginners.
2. Granny Square Christmas Stocking by Daisy Cottage Designs – This pattern uses the popular granny square motif for a unique look.
3. Striped Christmas Stocking by Repeat Crafter Me – This pattern features colorful stripes and a cute pom-pom detail.
4. Snowflake Christmas Stocking by The Lavender Chair – This pattern incorporates a beautiful snowflake design.
5. Reindeer Christmas Stocking by Yarnspirations – This adorable stocking features a reindeer motif and a cozy ribbed cuff.
6. Mini Crochet Christmas Stockings by Sewrella – These mini stockings are perfect for hanging on your tree or as gift toppers.
7. Chunky Crochet Christmas Stocking by All About Ami – This pattern uses chunky yarn for a cozy and quick project.
8. Santa Christmas Stocking by Yarnspirations – This festive stocking features a jolly Santa Claus design.
9. Crochet Christmas Stocking with Cuff by The Spruce Crafts – This pattern includes a video tutorial for visual learners.
10. Christmas Tree Stocking by Yarnspirations – This unique stocking is shaped like a Christmas tree and features a cute star topper.
With these free patterns, you can create a variety of Christmas stockings to suit your style and skill level. Crocheting your own stockings is not only a fun and rewarding activity, but it also adds a personal touch to your holiday decor. So grab your crochet hook and yarn, and get ready to spread some holiday cheer with your handmade Christmas stockings.
Tips and Tricks for Personalizing Your Crocheted Christmas Stockings
Christmas stockings are a beloved tradition during the holiday season. They are not only a festive decoration, but also a special way to show your loved ones how much you care. While store-bought stockings are readily available, there is something special about crocheting your own. Not only does it add a personal touch, but it also allows you to customize the stocking to fit your unique style and preferences. In this article, we will share some tips and tricks for personalizing your crocheted Christmas stockings, along with a free pattern to get you started.
First and foremost, when it comes to personalizing your crocheted Christmas stockings, the possibilities are endless. You can choose from a variety of colors, patterns, and designs to make your stocking truly one-of-a-kind. One tip is to consider the recipient’s favorite colors or interests when selecting your yarn. For example, if you are making a stocking for a sports fan, you could incorporate their team’s colors into the design. This small detail will make the stocking even more special and meaningful.
Another way to personalize your crocheted Christmas stockings is by adding embellishments. This can be anything from buttons and beads to ribbons and bows. These small details can make a big impact and add a touch of whimsy to your stocking. You can also use embroidery or cross-stitch to add names, initials, or festive designs to the stocking. This is a great way to make each stocking unique for each family member.
When it comes to the actual crocheting process, there are a few tips to keep in mind. First, make sure to use a pattern that is suitable for the size of stocking you want to make. You can find a variety of free patterns online, or you can create your own. Just make sure to adjust the pattern accordingly if you want a larger or smaller stocking. Additionally, consider using a thicker yarn or double-stranding your yarn to create a chunkier and more durable stocking.
One of the most important aspects of crocheting a Christmas stocking is the cuff. This is the part of the stocking that hangs over the fireplace or mantle, and it is often the most visible. To make your stocking stand out, consider using a different color or stitch for the cuff. You can also add a scalloped edge or a row of pom-poms for a fun and festive touch. Just make sure to keep the cuff consistent throughout all the stockings you make to maintain a cohesive look.
Another tip for personalizing your crocheted Christmas stockings is to add a special touch to the toe. This can be a small crocheted design, such as a snowflake or a Christmas tree, or you can use a contrasting color to make the toe stand out. You can also add a small jingle bell or a charm to the toe for an extra festive touch.
Lastly, don’t forget to add a loop for hanging your stocking. This can be a simple chain stitch or a crocheted loop. You can also use a ribbon or a piece of yarn to create a loop. Just make sure it is sturdy enough to hold the weight of the stocking when it is filled with goodies.
In conclusion, crocheting your own Christmas stockings is a wonderful way to add a personal touch to your holiday decor. With these tips and tricks, you can create unique and beautiful stockings that will be cherished for years to come. Remember to have fun and let your creativity shine through as you personalize each stocking. And don’t forget to spread the joy by sharing your crocheted stockings with your loved ones. Happy crocheting!
Q&A
Q: Where can I find a free pattern for crocheting Christmas stockings?
A: There are many websites and blogs that offer free patterns for crocheting Christmas stockings. Some popular options include Ravelry, AllFreeCrochet, and Crochet Spot.
Q: What materials do I need to crochet a Christmas stocking?
A: To crochet a Christmas stocking, you will need yarn in your desired colors, a crochet hook, scissors, and a tapestry needle. Optional materials include stitch markers and embellishments such as buttons or pom poms.
Q: Are there any tips for beginners on crocheting Christmas stockings?
A: Yes, some tips for beginners include starting with a simple pattern, using a larger hook size for a looser and easier stitch, and practicing basic stitches before attempting more complex patterns. It is also helpful to read through the entire pattern before beginning and to take breaks to avoid hand fatigue.


LEAVE A COMMENT